Measuring it Out
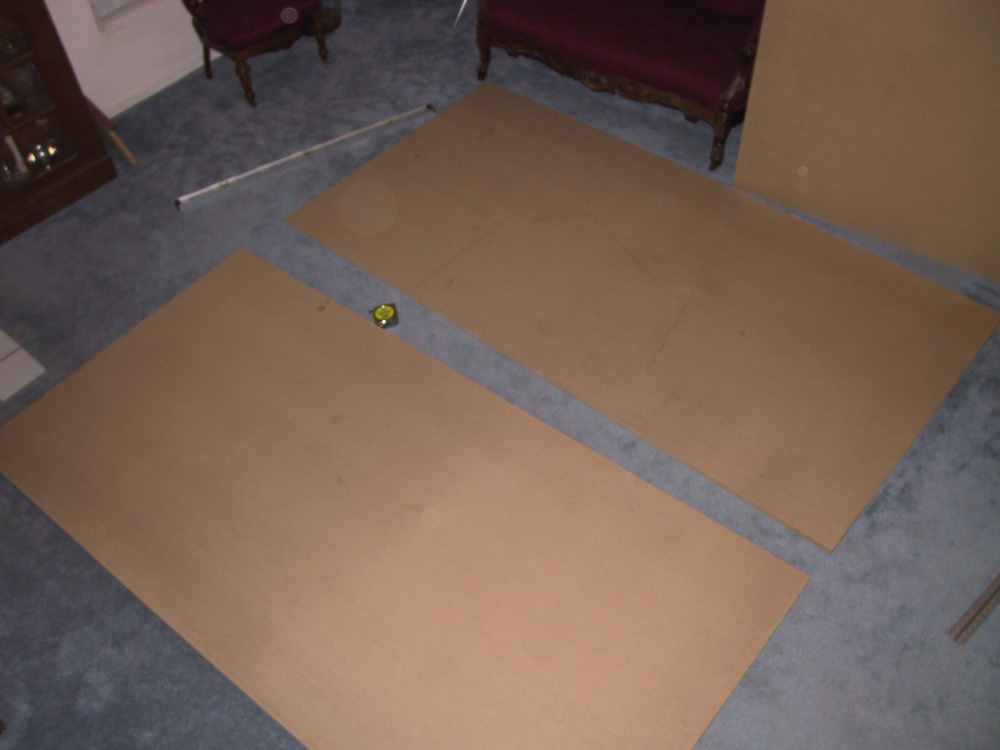 First step was to get the wood. I got 2 pieces of 3/4″ MDF 4×8′ which would be used mostly for the sides of the cabinet, the floorboards, and other parts that needed thicker support. MDF is “Medium Density Fiberboard” which is one grade higher than particle board. It’s better for this project because it is smoother, holds screws better, and can be routed without falling apart.
Having the TurboCad plans (From Jeff McClain’s Website, See the Design page) really helped speed up this phase. Since the design was already done, all I needed to do was measure out the dimensions on the board using a large metal drywall t-square.
Remember what you’re dad always told you.. Measure twice, cut once!!. Yeah, there was a little paranoia with making the cuts.. these MDF’s are NOT cheap.
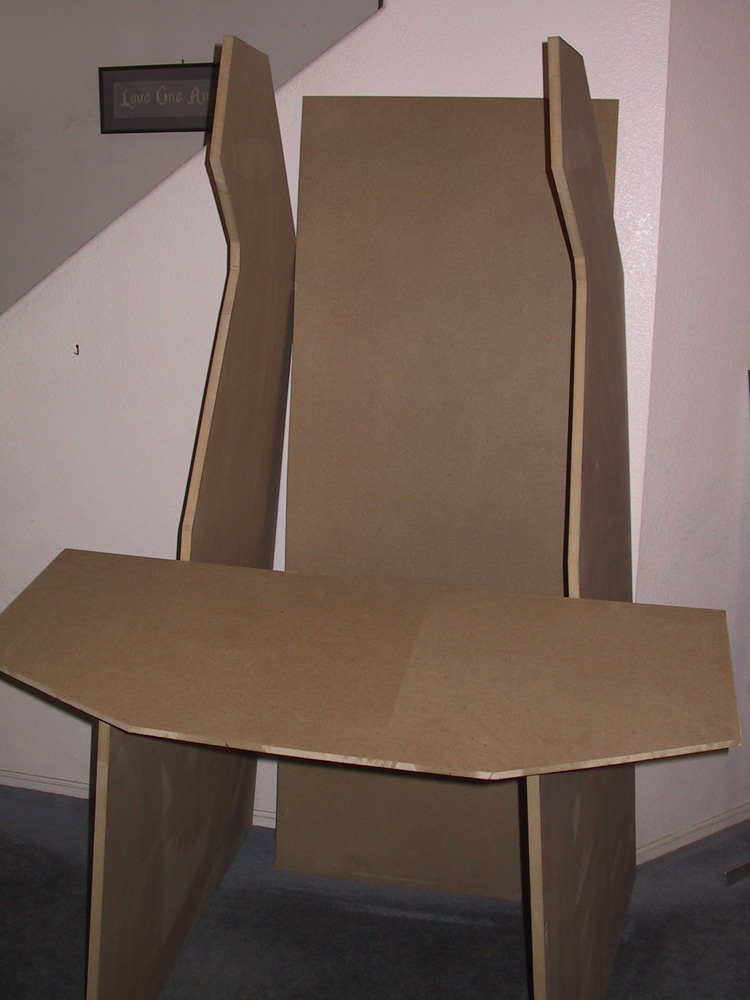
Taking a moment to appreciate the rough cuts. WOW that really looks like..like… the SIDE OF AN ARCADE MACHINE.. Whooo hoo.

mame-cutting-measurements
Measuring and drawing out the pieces

mame-cutting-plywood
2x pieces of 3/4″ MDF

mame-cutting-plywood2
My makeshift workshop.. my living room

mame-cutting-pieces
First piece cut
Speaker Holes
 When deciding how to do the speaker holes, I had many options after seeing what others had done. But, in the end I thought that the speaker holes looked really authentic, so I went with them. To cut the holes, I first measured a 5″ circle to roughly measure where each speaker would go. I then marked 1/2″ parallel lines from top to bottom.
Then, to be sure the long ovals lined up and looked equal, I drew a few vertical lines to help me decide roughly where the ovals would begin and end… once again, roughly is the key word here. To cut the holes, I first used a 1/2″ drill bit to drill the ends of each oval. Then I used a reciprocating saw to cut the “straight” lines.
This is what it looks like after the cuts were made. It doesn’t have to be perfect, since you probably won’t be able to see the cuts that well after the black paint goes on anyway.

The Aftermath
 Yup, this is the aftermath!! I was picking sawdust boogers for days. (hehe) I can’t wait until my MOM see’s this picture of the Victorian couch she reupholstered for me as a gift.. Sorry MOM! Good news is that it cleaned up better than new. (whew)
For those who want to know: YES I am married, YES Sharon (My Wife) offered for me to use the living room to make the cabinet. At the time we were living in Phoenix, Arizona, and working outside in 120 degree weather was not really an option. Thank you Sharon, I love you! Well, you guessed it, it’s now CLEANING TIME! Ugh!
AND.. finally, after the first days work, I HAD to prop the wood up together to see what it was going to look like. If you’re wondering, YES, when nobody was looking I did stand in front of it and use an imaginary joystick and buttons and play a mean game of Space Invaders. :)
Other MAME Articles in this Series

My MAME Arcade Machine
You Built a WHAT?? Many years ago (early 2000's), I built a MAME arcade machine cabinet. It was an incredibly fun and challenging project, and the final machine was so much fun to play. Even today, I have an occasional conversation where I bring it up,...

MAME – Design and Plans
Any time I start a new project, I always love going out and doing research. A huge win was discovering the Build Your Own Arcade Controls website, dedicated to people who had already built MAME cabinets, and resources with how to find anything you need to...
MAME – Cabinet Assembly
First order of business was to measure out and mark where all of the 2x2 supports would be attached. I figured that the kickboard was 3" and the casters I got should be mounted 2 1/4" recessed. So I measured in 2 1/4" and clamped in the first 2x2 support. This was...

MAME – Control Panel
The control panel is one of the core aesthetic reasons I decided to make a cabinet. The control panel is your physical interface to the games; the joysticks, trackball and buttons. My design for the control panel was so that it could be easily removed and...

MAME – Finishing Touches
First Computer System The first computer I put in was an old Pentium system I had sitting around. Specs: Compaq Pentium 166MMX with onboard video 64MB of RAM SBLive soundcard 2x CD-ROM 17" monitor Not a powerhorse by any means, but it sure does play a mean game of...