
Mysterium is a super-fun cooperative board game where a ghost tries to communicate with psychics to identify who murdered the unsettled ghostly victim. While a ton of fun to play, often board games of this complexity require setup time that is burdensome and can be a deterrent to playing. Fortunately, the solution to the problem I believe is very simple: the design of the box insert. With the right design, you can be up and playing in a fraction of the time, making the overall gameplay experience that much more enjoyable.
The original box insert that comes with Mysterium is already leagues above other games, keeping components separated and organized. However, it doesn’t facilitate a quick gameplay setup. So, I decided to redesign the box insert with a very specific list of requirements. I hit most, and although it was quite a challenge I think it turned out well.
My Goals
Knowing how the game sets up and how it’s played is crucial to how to design the insert. Having created a new box insert for Dead of Winter already, this list was much easier to create.
- A single removable tray for the ghost’s vision cards so that you can pull it out and place it next to the ghost quickly. A tray will keep them from falling over during gameplay.
- Individual trays for the psychic’s person/place/thing cards, vs. the ghost’s versions of those cards. Currently they are stored on top of one another, which makes it harder to get to cards during the random selection process.
- Separating the cards at the end of the game should be fast, without having to lift up cards to get to the ones underneath.
- During setup, you grab a deck, shuffle, pull out a random amount of cards and put the cards back. Lifting any set of cards out of these trays should be easy.
- Easier access to the crow, and guessing tokens that are normally stored in under unused cards in the box.
- A better way to store the larger flat pieces that normally sit awkwardly on top.
- When the box is closed and shaken, none of the parts or cards get mixed up.
- I wanted to keep part of the original design where the main ghost board would be locked in place when placed on top.
- Space available for future expansions. *Stretch Goal
Research
The first step is to see what others had done. Why reinvent the wheel if you don’t need to? Well, after a short bit of poking around, I only discovered a single existing design and it didn’t meet the goals I was trying to meet. Top Shelf Gamer sells a foamcore insert that is well made, but the design stacks all the cards of the same size together, requiring sorting before you could start. Also, I didn’t like how you couldn’t lift out the vision cards easily.
It’s not just enough to organize the pieces. The insert design must help you facilitate play as well. So, off to the drawing board.

The Design
I pulled all the components out of the box and measured them.
As I discovered when making the Dead of Winter box insert, I actually quite enjoyed working in the metric system. Working in decimals of centimeters was way easier than fractions of inches.
I quickly realized that the dimensions were going to be very tight, in some cases within a few millimeters. A prototype would absolutely be required before I could build with confidence.

The inside dimensions of the empty box measured 27.5cm square. The thickness of the foam core was .5cm, so a border around the entire inside leaves 26.5cm workable space. I subtracted .5cm for some margin of error and allowing the trays to easily be lifted in and out. The trays needed to be 26cm across, but when you subtract out again the thickness of the walls on either end, I only had 25mm of space across to fit the cards plus any dividers.
The real challenge ended up being in the 26.5mm the other direction. The trays of the person/place/thing cards needed to be 13mm, the separating wall is .5cm, and the tray of Vision cards needed to be 12.5cm. That sums to 26cm, with only .5 cm of slack across both the top set of trays and the bottom set of trays. Very tough margin of error for cutting manually. Let’s just say I did a LOT of dry fitting and testing before I glued.
I considered not having a dividing wall, but that would mean that the cards could easily slide out. I considered adding small retainer walls to the card trays to compensate. But I realized that without a cross-bar retaining wall, the large flat pieces would slide all over the place and it would be harder to put the trays back in the box at the end of the game.
The empty box had 7.5cm of vertical space. I know I wanted to keep a place for the board to set on top, which requires 1.5cm of space, so that left only 6cm of vertical space for everything else beneath it. When I designed the main structure, I left small tabs sticking up to hold the board in place. This feature was part of the original design, so I was glad to be able to keep this.
I considered creating a bottom to the insert, which allows you to lift the entire thing out easily. However, I really wanted to have that extra .5cm of space to use with the pieces. Every mm counted for everything to fit.

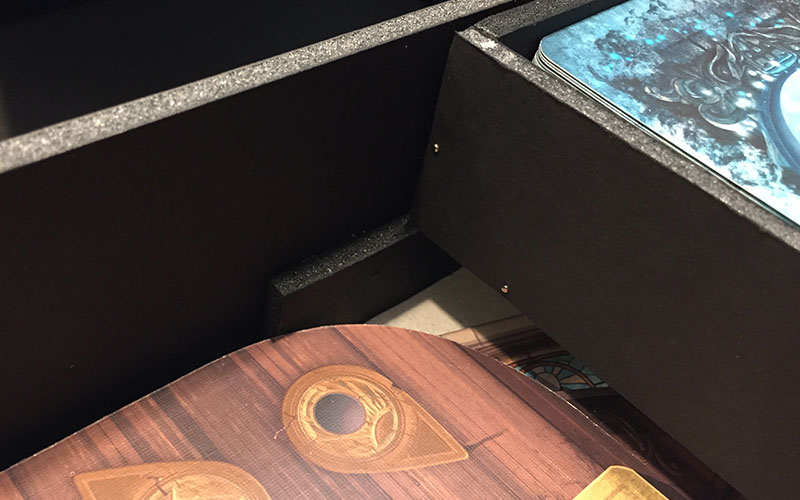
After designing the tray of the ghost’s person/place/thing cards, I realized I had long strip of extra space. Luckily, there was just enough room to put the timer. The depth of the space was only 2cm, but the timer required 2.5cm. Luckily, if you look at the photo above, you can see that it still fits because of the board location.

I decided to add small cutouts under the front of each of the cards. This allows your finger to easily reach under and grab the entire stack of cards.

The Build
Using cardstock, I cut out the prototype inserts and placed them. I drew in where the walls and separaters would go, so I could place the cards and tokens to get an idea of how it would all go toether. WOW, this was going to be tight so execution of the cuts needed to be extremely accurate.
The first thing I built was the exterior surround walls. I built it to be snug to the inside of the box, to make sure I had the entire 26.5cm of interior space left to work with. The cross-bar retaining wall had to be precisely placed before it could be glued.
The next step was to build the two trays for the ghost person/place/thing cards and the tray for the psychic’s versions. Once they were built, I placed them in so that I could find the exact placement of the dividing wall. There would be 0mm tolerance for creating the vision card bin, so I created it next and placed it in. Once I saw that both trays could be put in and removed easily, I marked the hard wall and glued it in place. WHEW! From here, I knew the rest would fit.
After I built the token bin and the vision card bin, I realized that they just lazily sat on top of the pile of those large pieces and it didn’t look very clean. The base of the clock is the largest piece to fit, which required 12.5 cm at its most narrow dimension. That was JUST enough to fit snugly in this bottom section. However, I found that if I moved it all the way to one side, I would be able to add small supports on the ends and a single small support between the two bottom trays to keep these trays up at the proper height. Again, not a lot of room for error here.
Small riser between the vision card bin and the token bin.
Mechanically, the build itself was pretty simple since I had done it before.
- Measure and cut with an XActo knife. Keep the knife perfectly perpandicular while cutting.
- Dry fit when possible
- Glue edges, and use straight pins to hold things in place. (I keep the pins in even after the glue dries)
- Wipe up excess glue.
- Test the fit after gluing.
Final Photos
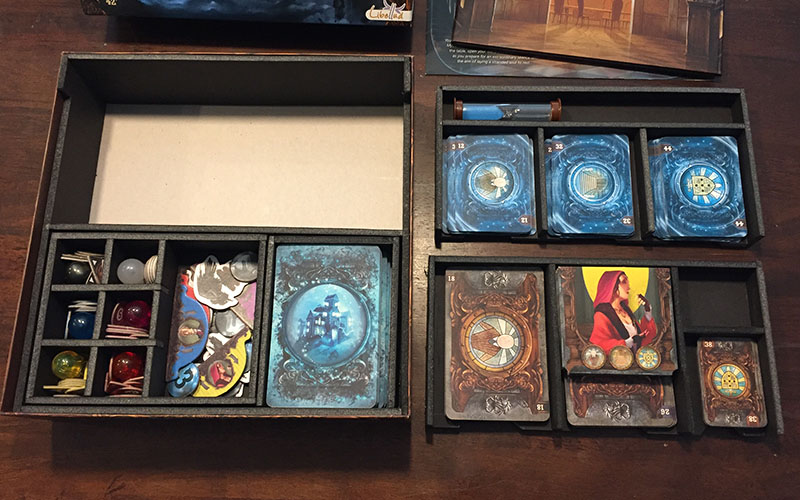
Now, unpacking and setting up the game is much faster. The two card trays are lifted out quickly, allowing us to pick our person/place/thing cards quickly. The token bin lifts out quickly and it’s small so it can sit in reach of the ghost when they need the crow or guessing tokens. The ghost grabs the stack of vision cards quickly and places them behind the screen.
Cleanup is also much faster. With all card bins easily accessible, putting cards back in their respective piles is quick and easy work. Dropping the trays back into the box is quck and the board drops easily on top.
It’s a much faster setup and cleanup time, and I’m happy with the overall results.


Post Mortem
Overall, I am very happy with the results. However, the perfectionist in me still has issues with the design. Hopefully, someone reading this will see these notes and perhaps take what I’ve done and make these fixes.
- Wasted space above the psychic’s thing cards. I wanted those cards to be easily grabbable like the other cards, but this created an awkward amount of unusable space.
- I wanted to be able to put expansions in the same box, but the vision card stack doesn’t have much room at the top. I’d have to set the stack 1cm lower, so that I could add 1cm of extra space in the stack.
- The player pouches were an awkward size. I wanted them to be stored in their own area, but for now they’re stored with the wide ghost’s place cards. There is still wasted space in this design, I wish I could find a way of moving things around to have a unique place for these.
- The 6 compartments for the player tokens are a little squished. They fit just fine, it’s just a little hard to get your fingers down in there to pull out the smaller pieces. I wish I had made the bin for the crow and other tokens a little bit smaller to allow more room for the player tokens. Minor note, it’s a little hard to see the difference between red and purple with the tokens down in their compartments.
Enjoy!
If you’re tackling a similar project, I hope sharing my thought process has helped you. I’m always happy to hear from people who find what I write useful, don’t be shy. Now… let’s go play some games!
